Wednesday, 15 May 2013

Baby Herbs and Clear Skies

These are our new baby herbs! This photo is actually a few weeks old, so they're much bigger now, but I'm slow at blogging :(


This must have been one of the first hot days, since there are no leaves on the trees yet!


Just sticks in the air.

Tuesday, 14 May 2013

Four to Eight Hours of Doodles

If you saw my last post, you will know that I was in a movie and I had a lot of time to sit around and doodle. I didn't doodle for all of the time I was sitting around (I did try to snooze and also to read, which lead to the snoozing) but I did doodle for a big chunk of time. Here's what came out of my third day of filming:


Ant Hill


Bad sketches


Shadows! OOooo!


WTF!!

This one obviously took up most of the time!

Monday, 13 May 2013

I'm in a Movie!

I got to experience what it's like to be a movie extra last month. I got a cool costume!


The film was set in the Ancient Roman Empire.


The background agency urged me to arrive with my hair curled, and this is what happened.


On set. Well, outside the set. I snuck this picture; don't tell anyone! All you can see are the crummy folding chairs we had to live on, and the cup prop table. And some pillars, I guess!

Overall it was a very interested experience. It was exciting to be backstage and see what it takes to make a movie, and exciting to see some famous people! It was not exciting when we had to sit in the dark for eight hours or more, doing nothing but sitting. The third day I was on set was so dull, I spent most of the time doodling the most intricate doodles of my life. I will post pictures of that tomorrow!

Friday, 10 May 2013

Tea, Nice Weather, and Good Times!

A perfect cup of tea.

Sunset at Central Tech.

Tea and Cappuccinos at the Dip. 

Looking at something silly...

And having a laugh!

Happy Friday!

Thursday, 9 May 2013

Turn a man's shirt into a Katherine-sized shirt!

I finally oiled my ol' sewing machine, and had to do something with it right away! Cue man's shirt transformation:


This is a man's medium, I think (I am small)


Be prepared to be dismantled, shirt!


If you look closely, you can see I pinned where my belly button lies, and I also pinned the sides of the shirt in at my waist.


Here is a close-up of those pins.


Here I CHOPPED off the bottom of the shirt at my belly button pin.


Then I chopped off the sleeves at their seams. After that, I cut the sides at my waist pins (with a seam allowance: see the ruler on the left? I made sure to do both sides evenly) and then also cut the arm holes closer to my neck. Well, I cut them where my shoulders lie. With a seam allowance. 


I re-sewed the side seams, at my measurement. Since I have nearly no bust, I cut straight up from my waist seam. If I had more bust, I would have cut it more at an angle, like an upside down triangle. 


See, I am shaped like a rectangle, not a triangle. I probably should have made it more triangular, since it is a bit tight at the bust. Ah well! That's what happens when you only measure once, and not twice.


I cut and re-sewed the arms so they weren't so baggy.


I also re-cut the shoulders and basted around so I could ease it in the armhole, since I don't know how well I cut it!


This is a weird picture of the arm in the armhole. See how I had to "ease" it in? It ended up working really well.


Here's a bit of context for that last picture- the arm is inside the shirt, right sides together.


Ta-da! A Katherine-sized shoulder. The sleeve is a bit long, but fine with me, since I will roll it up.


Poof! Two sleeves!


Now it's time to add the bottom part of the shirt. I guess I could have left it off, since crop tops are in fashion this summer... just kidding. I don't think that's a thing I'm going to do.


Not pictured: I based along the raw seam of the bottom half (at my belly button)


Pulling only one side of the thread, I gathered it all up so it aligned with the new smaller top part.


I made sure to pin that real good! I wanted a nice, even gather. I sewed across that pin line.


And here's the gather! It ended up falling a bit below my natural waist, but that's nothing a belt can't fix!


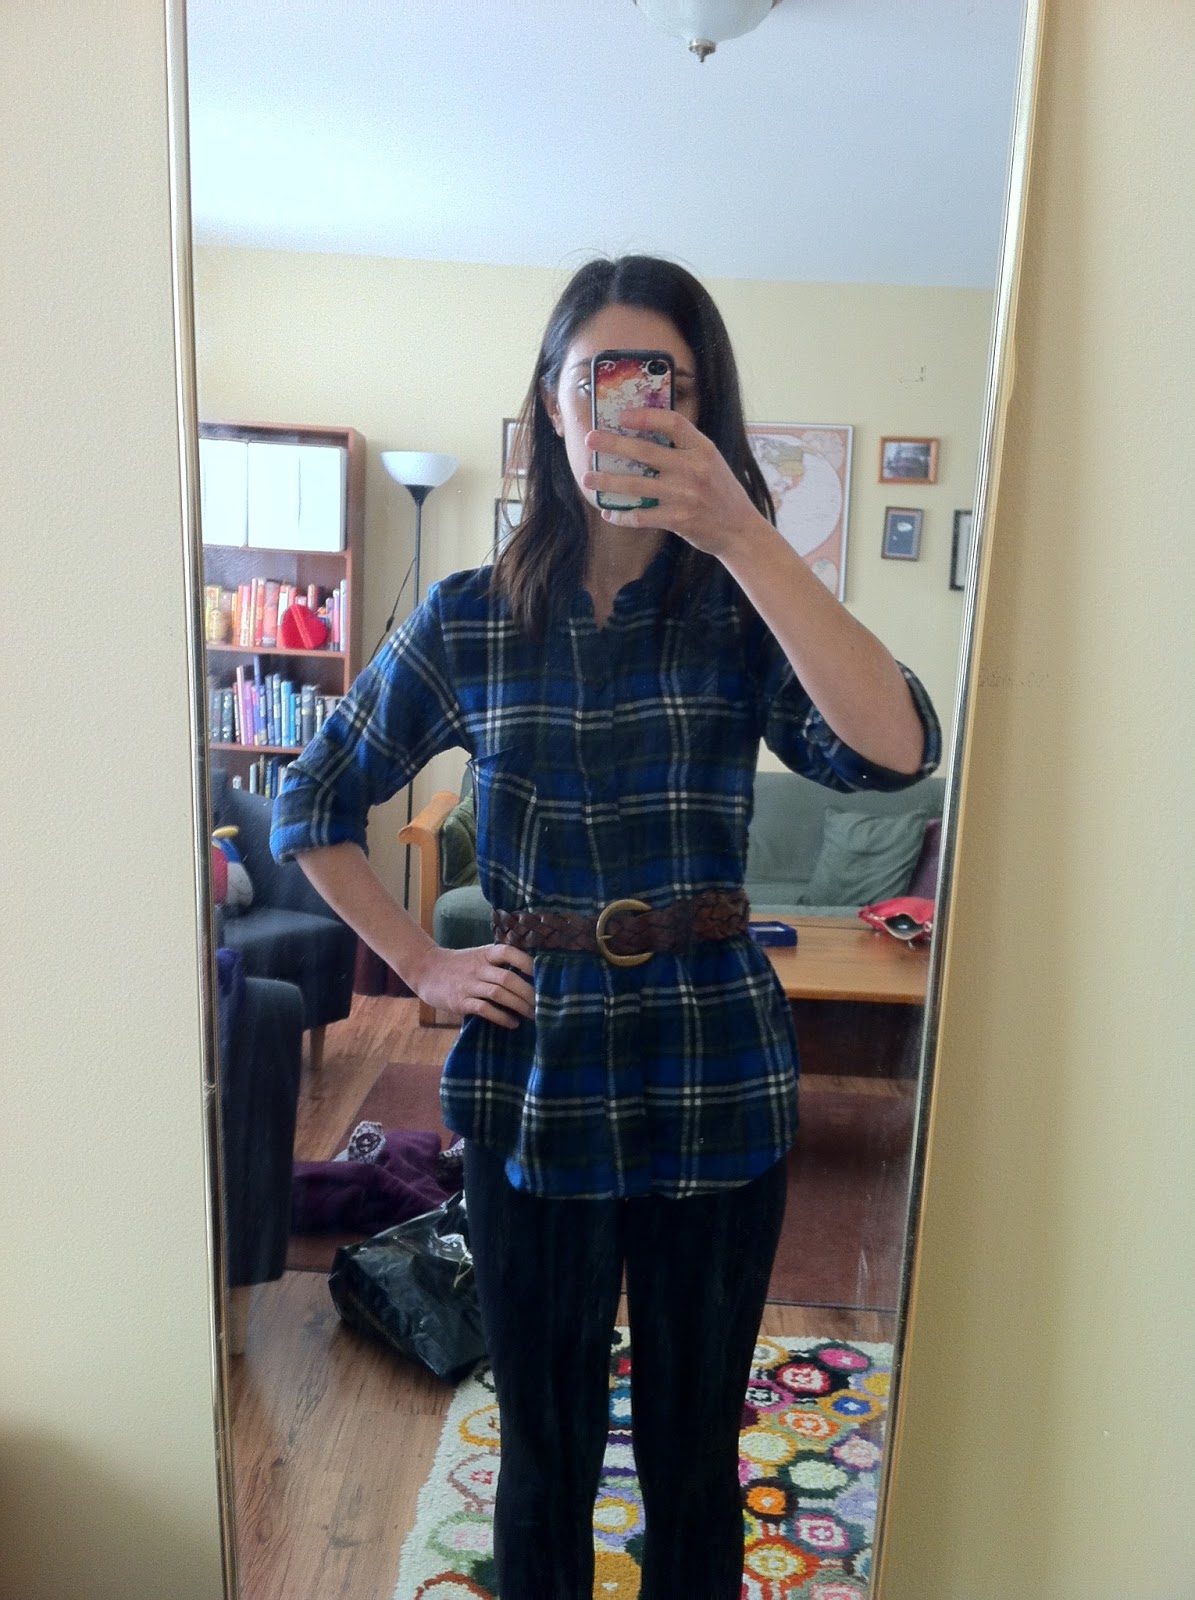
So here's the belt, and the rolled up sleeves. What a difference! Too bad it's pretty much summer weather now. I'll be saving this shirt for cold nights I guess!


Wednesday, 8 May 2013

Jewellery- Organized!

Last month, I re-discovered this box filled with my jewellery from three years ago. I thought it was all lost, so what a wonderful surprise to find it all again!


Mostly necklaces, this would be tough to keep clean.


I put most of the fully beaded necklaces in this basket.


My nicer necklaces I put into these book boxes.


Smaller, daintier necklaces found themselves in this smaller box.


And bigger "statement" necklaces live in this bigger box, along with a tiny earring box in the bottom right of the above photo.


Bracelets and pins and perfume ended up in this plastic drawer organizer, along with some big beaded necklaces that I don't wear so often.


Nail polish lives in another one of those drawers, just in case you were wondering?


I have another jewellery organizer to the left in this photo. It has most of my earrings, and dainty chained necklaces that I almost never wear, but have had for a long portion of my life. 

And that's it!

Tuesday, 7 May 2013

Practice Station/Router and Modem place/Mirror Stand/Table

This is a fun little thing that I thought was pretty creative. 


So between my desk (left) and my bookshelf (right), there was a gigantic mess of wires and modem/router stuff. This is where I wanted to put my mirror and my music stand, so something needed to be done!

That little shelf is actually a drawer from an old desk. That panel on the left is the front of the drawer, the top is one of the sides, the left is the back, and the back is the bottom. The other side of the drawer had broken off (and I used it somewhere else, you'll see in another post!) So it made the perfect little shelf for my things!


I had to saw out this little hole to run the cables through. I did this with a power drill and a small hand saw. 


I didn't have any sandpaper, so the edges are a little rough, but see how it works?


There's plenty of room for my flute stand to go under there as well!


I decorated the top with old scrapbook paper that I've had for years and years. Not as colourful as I might have liked, but it has planes and I like planes!


It's so inconspicuous in this room, but super useful. I keep a box of tissues on there, plus it's a perfect place to keep a glass of water and my metronome. I also dump my purse on there as well. 
Next step, clean that mirror! Wow it's so dusty!