Wednesday, 18 September 2013

How to make the best sandwich

I have a problem. Whenever I make myself a sandwich or a wrap, I will also over-stuff it SO much, that I have more of a messy salad type thing on my plate with bread floating around in there somewhere.


I realize my problem: the surface area of my bread is not large enough! I always buy fresh loaves of bread from either a bakery or the bakery section of my grocery store. Nothing compares to fresh bread. I used to buy the super healthy "20 grains!" bread from Country Harvest or whatever it's called, but that does not compare to a fresh loaf of "many grains" bread. (When shopping for whole wheat breads, do you ever get overwhelmed by the different kinds? 7-grain, 12-grain, ancient grains, flax, whole wheat, etc? I sure do.) 
Anyhow, the bread slice itself isn't very big, so I have to stack my yummy fillings upwards. 

Here is what I put on this super delicious killer sandwich:

-Hummus (homemade!)
-1/4 avocado, sliced, but sometimes I mush it into the hummus. Yum!
-1/4 roma tomato, sliced
-1 inch or cucumber, sliced into six slices
-1 chicken leg, pulled off the bone with my fingers!

How to make:
-toast the bread
-put the stuff on. It's like setting up a game of jenga!
-eat it somehow!

After I finished this sandwich (which had many casualties; my plate had at least two slices of tomatoes, bits of chicken, and a few cucumbers feeling left out! So I ate them, obviously!)
I had a cup of matcha green tea and two squares of Lindt caramel and sea salt dark chocolate. YUM!

I love lunch!

Sunday, 15 September 2013

Cute Pencil/Makeup/Anything Bags!

 
Hello friends! I've been feeling pretty crafty lately, and then I watched this DIY tutorial by Anneorshine and decided to do things a little bit differently. I was going to make up my own "tutorial" blog post, hence the measurements in the photo below, but then that was too much work for this simple blogger! I'll still talk about what I did though! Oh and check out my etsy shop where I will be selling things!

Two squares, cut 'em out.

Sew the 10" sides together, right sides together

Look at that seam all ironed open!


It sure looks nice on the outside!

Iron the other raw edges of the 10" side 1/2" in. Pin the zipper facedown on that.
 While you're procrastinating sewing the other side of the zipper, cut out a small rectangle of fabric. I think this was 2.5" by 6"
 Fold in half length-wise, and then sew the raw edge.
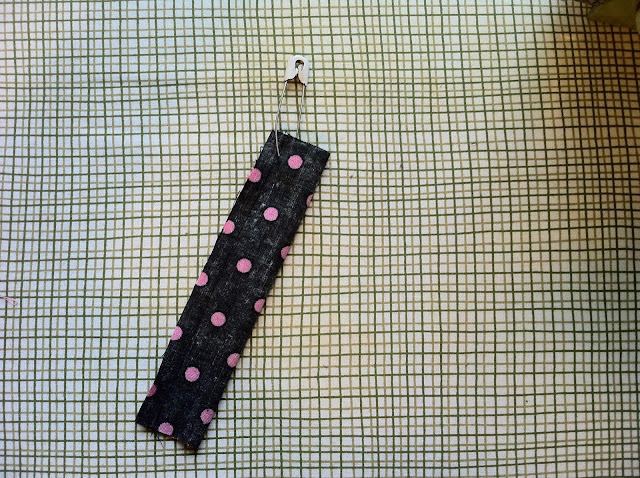
 If you're like me and have a handy-dandy diaper safety pin, use that to flip it inside-out!
 And then fold it in half width-wise and press. It's a tab now!
 Ok. Do the other side of the zipper now. I don't have a zipper foot on my crumby sewing machine, so this sucked. But it still worked OK. I just maybe swore a lot.
 This is what it looks like right-side-out! If you look at the seam to the right (bottom of the zipper), I did sew the fabric pieces together there. My zipper wasn't long enough to reach the ends, so I had to sew it up.
 Now the fun pleat part! Fold in the long edges. I think in origami this fold is called "inside reverse fold"
 Here are both sides folded inwards. Oh look! Let's put that tab somewhere. I'm sneaking it underneath the top of the zipper (where I didn't finish the seam) so it will appear on the outside of the bag.
 See how I've folded out the zipper so you can see? See?
 And then I pinned the zipper edges back over top the tab.
 Get those ends sewn. MAKE SURE THE ZIPPER IS UNDONE BEFORE YOU SEW THESE SEAMS. IF IT'S NOT, YOU WILL BE S**T OUT OF LUCK TRYING TO FLIP IT RIGHT-SIDE OUT! (I'm yelling because I know from experience.)
 This is how it looks now! But the tab needs to be secured higher up to meet the top of the zipper (because my zipper was too small)
 See those yucky zipper ends? I'm going to tack the tab up on top of them.
 My hand is showing you where I will sew next.
 Of course, I used black thread on black fabric, so you can't see the tack stitch. Just know that the tack stitch is keeping the tab pointing up.
Now it's done!

Wednesday, 11 September 2013

Motivation Check-list Calendar


I've been experimenting with different ways of organizing my time.  I tend to have large chunks of time to myself during the day. You might think "awesome! You could watch so much TV!". No, I can't. I'm mostly self-employed, and my free time must be used wisely, and mostly for professional and personal development. I have made calendars in the past that include hourly "do this do that" in and around the things I do during the day that are actually scheduled, like teaching and rehearsals. That never really worked out for me. I think I've figured out why. If I scheduled in "practice" from 9-11am every day, but say one day I felt off in the morning and didn't practice. The likelihood of me making up that practice time at another time is not very high, since I've probably scheduled the rest of my day with other stuff. Also, if I stop following my strict schedule in the morning, why should I care if I'm off track for the rest of the day?

With the checklist style of this calendar, I can do these things in whatever order I please. This suits me! It's better than having no calendar, because it makes me accountable and gives me a visible reason to accomplish things. Even if I miss something one day, I can easily see when I did it last, and when I should do it again. 

I will try this out for the month and see if it really does work for me! I was inspired to make this after seeing tons of fitness bloggers make calendars like this for their members. (toneitup, blogilates, tarastiles). I decided to make a Katherine calendar!

I hope you like it, and I hope it inspires some motivation to you too!

Tuesday, 3 September 2013

Fall Inspiration


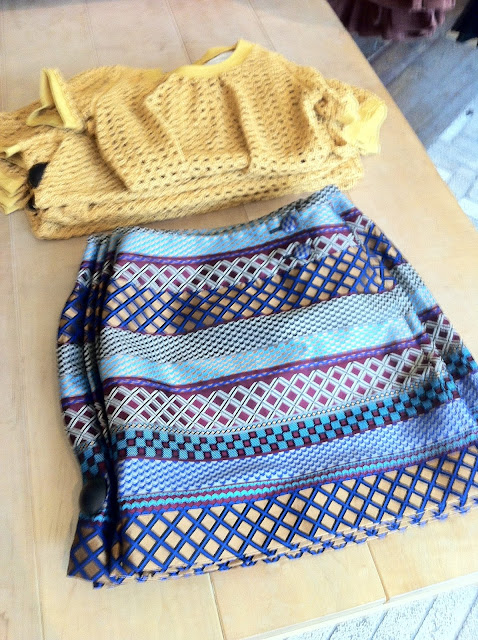
I was wondering through a store the other day, when I unexpectedly had two hours to kill downtown. I decided to take that opportunity to sit and drink tea for an hour, and then wander through stores and take photos of clothes I liked. I love the skirt up top. I think a nice structured and patterned skirt like that should be in my future! And also an army-green fall jacket. Just a thought. 

Monday, 2 September 2013

My last purchase before the Autumn challenge!

Hello friends! I wanted to share with you my latest purchase, and my first free find! 


New running shoes! I took a stroll to the Running Room earlier this week to find some new shoes. I tried on a bunch of different pairs, which I highly recommend when buying runners. The ones that I ended up buying felt so right on my feet. They feel like I'm not wearing shoes at all! Also, they are black and neon colours.

Here they are on my feet.

While wandering around my neighbourhood on the same day I bought my shoes, I came across this longchamp purse! It was in a box labelled "free stuff". It has a little wear and tear on the handles and corners, so I know that the previous owner really got good use out of it. I've already used this bag! The day I found it also ended up being the day I was caught off guard by a thunderstorm. This bag kept my other purse and my sweater pretty much completely dry! 

This weekend is a very big moving weekend in my city, so I will be wondering around for more "free stuff"! I'm hoping to find a small/tall table for my kitchen. Wish me luck!